Wednesday 31 October 2012

Happy Hallowe'en


On the back of the t-shirt it says: If the broom fits, ride it.

Happy Hallowe'en!

Sunday 28 October 2012

Hallowe'en Sewing

Hallowe'en is just around the corner and I needed to get my costume ready. I've had this in mind since I saw this picture on pinterest:


see: http://www.etsy.com/listing/82405814/spellbound-sadie-witch-includes-tutu

So, today I got busy. I started with this:


which is some black broadcloth, and 5 different colours of tulle (yellow, purple, black, orange, lime green). The light is horrible in this photo so the purple looks more like pink.

And 2 packages of elastic - 1 package 2" non-roll elastic and 1 package of 3/4" regular elastic.

Then I sewed. I'll reveal on Wednesday.

Wednesday 24 October 2012

Dear Jane

I finished my Dear Jane homework for this round. I can't go to the class on Saturday - I'm convening a volleyball tournament instead. Total pieces to date, sewing the blocks my way: 1585

M9

T3

Tuesday 23 October 2012

TTT - Twirling Seams

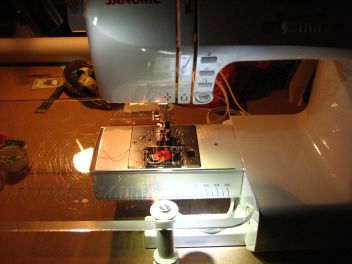
I've had a busy week and weekend and didn't think I'd have anything to post this week (much like last week). Then I decided I'd sew a little tonight to finish my Dear Jane homework and realized I could TTT about twirling seams. Here goes...

Twirling seams flattens out some of your seams and so reduces bulk in a four square patch. Here's what I did on a Dear Jane triangle block.

1. Press your seams all toward the dark - in this case, the green.

right side of fabric (please excuse the bad lighting)

wrong side of fabric with seams pressed towards the dark (green)
2. Then, sew another piece to the first one. If you always press the fabric the same way (in this case, towards the dark), then your seams will nest together nicely and you get better points.

3. You need to pick out the 2-3 stitches on your vertical seam that are in the seam allowance of your horizontal seam (blue arrow). The pink arrow is the vertical seam. You will pick out stitches directly above (north) of the intersection of the arrows. Pick them out on both sides of the fabric.


4. This is where I used to get messed up. Open up your fabric. The seams will fall open in the way they will want to lay (sometimes you have to help them a little).

Starting to fall open

I helped them fall open

You can fingernail press along the seam to help
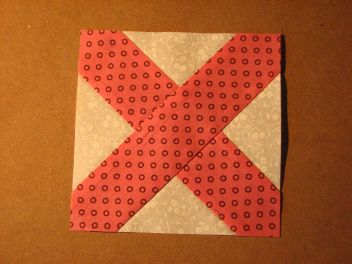
If you look where they fall open, they  make a sort of square out of the two colours of the fabric - in a checkerboard pattern.

5. Press. I press this seam from both sides because I think it lays flatter.
Here's my finished Dear Jane triangle
back side of the triangle

back side of another twirled seam square
When I first learned this technique it took me a while to figure it out. Practice on some scraps. Once you get it, you'll love it!

Sunday 14 October 2012

Creative Festival

Today I went to the Creative Festival in Toronto with one of my young quilty/sewy friends. She bought a lot - I bought nothing, except lunch.

I saw some neat things...
Giant cake

cake detail

cake detail

I liked this drunkards path layout. Can't remember the shop name.

made from sugar! check out www.cssainc.ca

sugar art

more sugar

The following are corsages made from sugar. They are orchids. They are stunning.


From the Markham Quilt Guild. This quilt has 30,000 squares in it! Each square finished at about 1/2"
Honestly, I'm a little disappointed in the show - again. It's neat that it's a creative mixture of crafts - sewing, quilting, scrapbooking, knitting, etc, but then it's also about a lot of things and so I didn't think there was a lot of specialty items. None of the fabric vendors had yardage - everything was fat quarters.  Nobody had what I was looking for. I like the spring show much better - and it's cheaper. I had an enjoyable day so it wasn't a lost day.


Tuesday 9 October 2012

TTT - Padded Hangers

I have a little extra padding - I wish it was as easy to move around as this hanger padding.

I think I got this idea from pinterest - maybe not - I do know it's not an original idea. I love it though!


1. Go to your local home supply store - I went to Home Depot.

2. Find the foam insulation in tubes that goes around pipes. It's probably in the plumbing section. It's the insulation you put around the pipes of your hot water heater. It's dirt cheap - maybe $2 a piece.

3. Buy some.

4. Cut with scissors to the length of your hanger. This insulation has a sticky piece to close the tube - I left the plastic on there so it didn't get "sticky goop" all over my fabric.

These are great if you have heavy projects to hang or ones that will hand a long time. You don't get a bad crease in them from regular hangers.

Happy Quilting!

Monday 8 October 2012

Happy Thanksgiving Dear Jane

Happy Thanksgiving to my Canadian friends! I hope you had a wonderful day - we did here.

I got some more Dear Jane pieced today...

I7

J4

K13

L1

Sunday 7 October 2012

Back to Dear Jane and other sewing tidbits

It has been a wonderful Thanksgiving weekend for family, relaxation, and sewing.

I'm back to my Dear Jane quilt - the class started up again. So far, here's what I've finished:


H9

G5

C11

E8
I haven't worked on these since the end of July - I forgot how tricky some of them can be. At least we started with C11, which was fairly straight forward.

I also finished a scarf I knitted for my cousin who lived abroad. She's been home for a visit and it's an early birthday present. The yarn is 100% bamboo and is divine.

the detail shot

the "artsy" shot
And finally, I need to stop sewing over pins

this beauty was created trying to hem a pair of yoga pants.

Tomorrow we are having Thanksgiving dinner at supper time so I hope to get some sewing in before I have to clean off the dining room table of my sewing gear so that we can eat.

Happy Thanksgiving!

Tuesday 2 October 2012

TTT - Bendy Bright Light

Some weeks I think if it weren't for this weekly post I wouldn't get anywhere near my blog - and therefore, no where near the sewing machine.

I got this handy-dandy little light probably 4 or 5 years ago. I love it! Just after I got it, when I went to quilt classes, people would ask about it. I happily told them how much of a difference it made to my sewing. Finally, I could see much better than before.


So many of us sew in spaces that don't have great lighting. I'd love a second floor sewing room with tons of natural light - I should dream on, unless I win the lottery or marry a lot of money! Having great light is important so that we can see what we're doing, and sew into the wee hours of the night, if necessary.

This light attaches with sticky stuff to the side or top of your machine. You can remove the light - you press on the level that's at about 1:00 (in the above photo) and you can slip out the light and cord. I only do this when I take my machine in for servicing. The sticky stuff hasn't come unstuck in all the years I've had the machine. I've also seen replacement brackets - I'd get that if I was switching the light between machines.

The light is LED and should last thousands of hours. I think I paid around $40-$50 for the light - I do know I got it on sale, so I think around $50 is the going rate. It's totally worth it in my opinion.

light on

light off
The arm adjusts so that you can place the light wherever you want.

Happy sewing!