 |
| photo from http://zakkainspired.blogspot.ca/2010/07/deconstructed-pouch.html |
Alas, the bag is too tiny but still very cute and I made a tutorial so here goes. I will use it in my new work bag to hold coins. I used this, and this, and this as my pattern/instructions, with some modifications.
Materials:
some fabric
zipper
interfacing if you want it
1. Dump out your purse and find the things you want to store in the bag.
 |
| contents of my purse |
 |
| what I wanted in the bag |
3. I like the symmetrical look so your short side is the length of your desired size + seam allowances and a bit of turning space. Make your long side double your short side.
4. Cut lining (3.5"x7" in my case), outside same as lining, a piece of interfacing if you want it, a zipper, and 2" x double length your want for a pull tab (2x2.5" in my case for a 1" pull tab).

 |
| oops, forgot the pull tab in the first photo |
6. Make your pull tab. Press your fabric in half lengthwise, then open up. Turn in your side edges to meet the centre pressed line. Press. Fold in half again. You should end up with a piece that is 1/2" wide x length of your strip.
 |
| in half |
 |
| press long edges in |
 |
| all done |

7. Lay your outer fabric right side up on the table with the short edge horizontal. Place your zipper pull side to the LEFT and pull side down. I lined my zipper ends up with the long edge.

8. Lay your lining piece right sides together and line up your short edge with the zipper. Pin through all the layers. Your zipper should be sandwiched between your lining and outer fabric. I opened the zipper and sewed with a 1/4" seam with my zipper foot. Backstitch at the beginning and end.

9. a) This gets tricky so go slowly. Lay your sewn piece right sides up. Your zipper should be unsewed side up.

b) Fold up your outer fabric to match the zipper. Right side should be facing the zipper

c) Fold in your lining to the zipper; right side of fabric should be facing the zipper. You should have the zipper sandwiched between your two layers of fabric and fabrics should be right sides together.
 |
| from the top |
 |
| from the side |
10. It should look like this:
 |
| it should make a tube when you close the zipper |

Now, close the zipper but only half way through the bag. You need it open at least half way to turn the bag inside out at the end.

11. Time to sew one side. Take the side with the zipper tale. Fold your fabric in half so that the midway point of your fabric is centred on the zipper (I measured to make sure it was equal). Pin.

Add your pull tab between the outside of the bag and the zipper. Centre it on the zipper. I left a little tale hanging out and clipped the zipper already. You have 4 layers of fabric to sew through plus the zipper plus the pull tab.

 |
| if you look inside you see this |
 |
| sewn together |
 |
| close up of seams |
 |
| view looking down |
 |
| side view |
 |
| close up of zipper, lining is on top in this photo |


14. Sew shut the hole for turning with a scant seam. Don't catch any outer fabric in your seam.
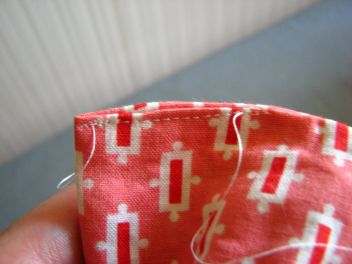
Now turn it inside out through the zipper. This is why you left the zipper open earlier.
All finished. My sides are about 3 1/4" long which is what I was hoping for. The reason it's too small is that my not-always-on-mathematical-brain failed to account for the fact that these sides slope so the only place the bag is long enough is the very bottom. It's still cute and I'll use it for something else.

